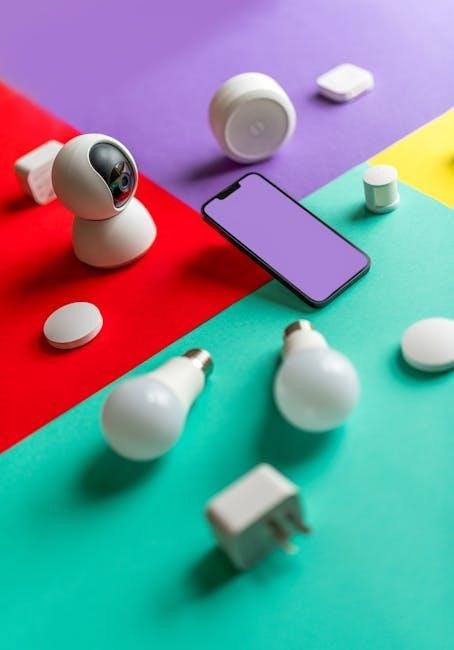
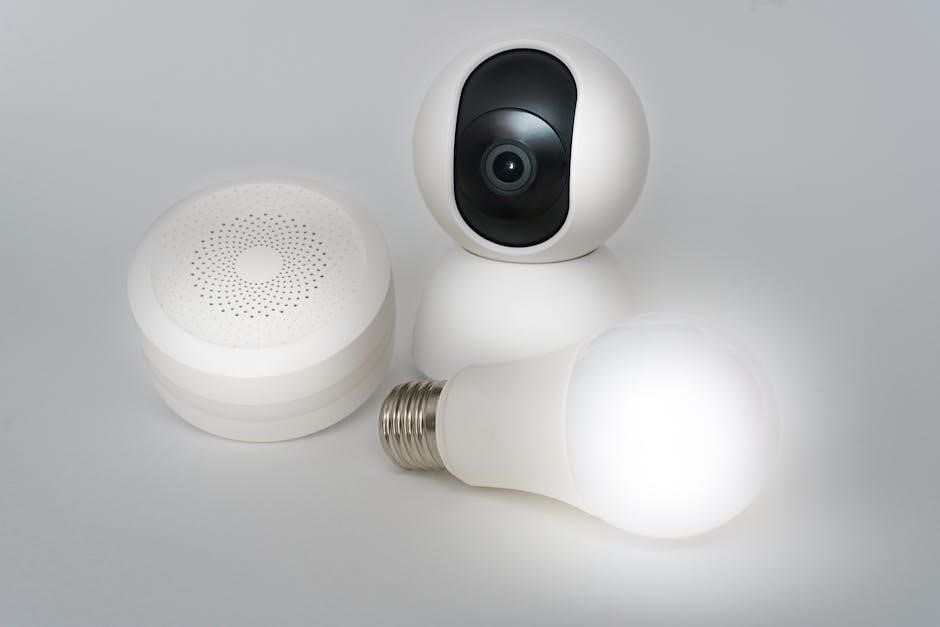
A light bulb security camera offers an innovative solution for home surveillance, combining a functional light with a hidden camera. Easy to install and discreet, it provides remote monitoring and night vision capabilities, enhancing home security effortlessly while blending seamlessly into everyday lighting fixtures.
Installation
Installation is straightforward: screw the camera into a standard light socket, download the app, and follow in-app instructions to connect and configure your device for seamless home security.
Screw-In Installation
The screw-in installation process for a light bulb security camera is simple and requires minimal effort. Start by ensuring the camera is compatible with your light socket type, such as E27 or E26. Turn off the power to the light fixture at the electrical panel to avoid any accidental activation. Carefully remove the existing bulb and screw the camera into the socket in a clockwise direction until it is securely seated. Ensure the camera is tightly fitted to maintain proper connectivity. Once installed, turn the power back on and proceed with the app setup to connect the camera to your Wi-Fi network. This method eliminates the need for additional wiring, making it a hassle-free solution for home security. Always refer to the manufacturer’s guidelines for specific models to ensure compatibility and safe installation.
App Setup
Setting up the app for your light bulb security camera is a straightforward process. Begin by downloading the companion app, such as IPC360 HOME or Lorex Classic, from the App Store or Google Play. Open the app and create an account or log in if you already have one. Tap on the “Add Device” or “Add Camera” option and follow the in-app instructions to connect the camera to your Wi-Fi network. Ensure your phone is connected to a 2.4GHz network, as most cameras only support this frequency. Once the camera is detected, allow the app to pair with the device. After successful pairing, name your camera and set its location for easy identification. Customize settings such as motion detection, notifications, and recording preferences. Finally, test the camera’s live view to ensure it’s functioning correctly. This setup process ensures seamless integration and remote access to your security camera.

Physical Placement
Physical placement of your light bulb security camera is crucial for optimal performance. Screw the camera into an existing E27 or E26 light socket, ensuring it is securely fitted. Position the camera under a covering, such as a porch or awning, to protect it from direct weather exposure. Adjust the camera angle manually to achieve the best field of view. For outdoor use, ensure the socket is rated for exterior use and can handle the camera’s power requirements. Avoid pointing the camera directly at light sources to prevent glare. Place the camera in a location that provides a clear view of the area you want to monitor, such as a front porch, backyard, or driveway. Ensure the camera is level and stable to avoid shaky footage. Proper placement enhances motion detection accuracy and ensures reliable surveillance. Always follow safety guidelines when installing electrical devices.
Wi-Fi Setup
Connect your light bulb security camera to a 2.4GHz Wi-Fi network using the companion app. Ensure your router is compatible and the signal is strong for reliable remote access and notifications.
Connecting to Wi-Fi Network
To connect your light bulb security camera to a Wi-Fi network, open the companion app and select “Add Camera.” Choose your camera from the list and enter your Wi-Fi password. Ensure your router supports 2.4GHz networks, as most cameras are not compatible with 5GHz. Once connected, the camera will appear in the app, allowing you to monitor and control it remotely. A stable internet connection is crucial for real-time notifications and video streaming. If prompted, update the camera’s firmware during setup for optimal performance. After successful connection, test the camera’s live view to ensure everything is working properly. This process ensures seamless integration into your home security system, providing peace of mind with reliable monitoring capabilities.
Network Requirements
Your light bulb security camera requires a stable 2.4GHz Wi-Fi connection to function properly. Ensure your router supports this frequency, as 5GHz networks are not compatible. A strong internet signal is essential for real-time monitoring, motion notifications, and remote access. Avoid placing the camera in areas with weak Wi-Fi coverage to prevent connectivity issues. Additionally, ensure your router is configured correctly and that no firewall settings block the camera’s communication. For optimal performance, maintain a minimum internet speed of 5Mbps. If you experience connectivity problems, restart your router or check for firmware updates. A reliable network connection is critical for maximizing the camera’s features and ensuring your home security system operates seamlessly.

Features
Light bulb security cameras offer 1080P HD video, night vision, and motion detection. They provide remote access, PTZ control, and two-way audio for enhanced security and convenience.
Motion Detection
Light bulb security cameras feature advanced motion detection, alerting you to any movement via smartphone notifications. Adjust sensitivity settings to minimize false alerts and ensure accurate detection. The camera automatically triggers recording when motion is detected, providing real-time alerts and peace of mind. Customizable settings allow you to tailor notifications to specific times or areas, ensuring you stay informed without unnecessary interruptions. This feature is particularly useful for outdoor setups, where motion detection can help monitor activity around your property. By integrating seamlessly with the app, motion detection enhances your home security system, offering an extra layer of protection and convenience. Regular firmware updates ensure optimal performance, keeping your camera up-to-date with the latest advancements in motion detection technology.
Night Vision
Night vision is a critical feature of light bulb security cameras, enabling clear video capture in low-light conditions. Using advanced infrared or intelligent night vision technology, these cameras provide high-quality images even in complete darkness. The night vision mode automatically activates when light levels drop, ensuring continuous monitoring. With this feature, you can enjoy peace of mind knowing your property is secure around the clock. The camera’s night vision capabilities are particularly useful for outdoor placement, where illumination may be limited. Customizable settings allow you to adjust sensitivity and enable or disable night vision based on your preferences. This feature enhances the camera’s effectiveness as a security tool, offering reliable surveillance regardless of the time of day. Regular updates ensure optimal performance, keeping your camera equipped with the latest advancements in night vision technology for superior clarity and reliability.
Remote Access
Remote access is a key feature of light bulb security cameras, allowing users to monitor their property from anywhere via a smartphone app. By connecting the camera to your Wi-Fi network, you can stream live video, receive notifications, and adjust settings remotely. The app enables features like motion detection, two-way audio, and video recording, providing comprehensive control over your security system. Whether you’re at home or away, remote access ensures you stay informed about any activity captured by the camera. This feature is particularly useful for outdoor cameras, where physical access may be limited. With remote access, you can enjoy peace of mind knowing you can check in on your property at any time, enhancing your home security experience with convenience and flexibility.
Placement
Light bulb security cameras are easily placed in existing sockets, offering versatile indoor and outdoor installation. Ensure outdoor placement is under a covering for protection and adjust the angle for optimal coverage.
Indoor vs Outdoor Placement
Light bulb security cameras are versatile and can be used both indoors and outdoors. For indoor placement, simply screw the camera into a standard E27 or E26 socket, ensuring it blends seamlessly with your existing lighting fixtures. This makes it ideal for monitoring living areas, hallways, or kitchens without drawing attention. Outdoor placement is equally straightforward, with many models designed to withstand weather conditions when installed under a protective covering. Ensure the camera is positioned to capture clear footage while maintaining a discreet presence. Always check compatibility with your socket type and ensure proper installation to avoid electrical issues. Adjusting the camera angle is crucial for optimal coverage, whether indoors or outdoors. This dual functionality makes light bulb security cameras a practical choice for comprehensive home surveillance.
Socket Type Compatibility
Light bulb security cameras are designed to fit standard socket types, ensuring easy installation. Most models are compatible with E27 or E26 sockets, which are common in residential lighting fixtures. Before installing, ensure your socket matches the camera’s requirements to avoid electrical issues. The camera typically supports voltage ranges of 110V to 240V, making it suitable for various regions. For outdoor use, verify that the socket is weather-protected or install the camera under a covering to prevent damage. Some models may require specific socket types for optimal performance, so always check compatibility before purchase. Proper socket installation ensures reliable operation and prevents potential hazards. This versatility allows the camera to blend seamlessly into existing lighting setups, enhancing security without compromising functionality.
Adjusting the Camera Angle
Adjusting the camera angle on your light bulb security camera is crucial for optimal coverage. Most models allow manual adjustment by extending, panning, or tilting the camera to find the perfect view. For precise control, some cameras offer PTZ (pan-tilt-zoom) functionality through the app, enabling remote adjustments. To maximize visibility, ensure the camera is positioned to capture key areas like doorways or driveways. Experiment with different angles to minimize blind spots and ensure comprehensive surveillance. If needed, consider using mounts or extensions to enhance flexibility. Proper alignment ensures clear video quality and effective monitoring. Always test the camera’s field of view after adjustment to confirm it meets your security needs. This step ensures your camera is strategically placed for maximum effectiveness, providing peace of mind with reliable coverage.

Maintenance
Regular maintenance ensures optimal performance. Clean the camera lens periodically to maintain clear video quality. Check for firmware updates to enhance security and functionality. Monitor battery levels and recharge or replace batteries as needed to prevent downtime.
Cleaning the Camera
Regular cleaning is essential to maintain the camera’s performance. Use a soft, dry cloth to gently wipe the lens and exterior, removing dust and smudges. Avoid harsh chemicals or abrasive materials that could damage the surface. For stubborn spots, lightly dampen the cloth with water, but ensure it is not soaking wet to prevent moisture damage. Check the camera housing for dust buildup and clean it with compressed air if necessary. Pay special attention to the lens, as smudges or fingerprints can blur the video feed. Cleaning should be done periodically, especially in dusty environments, to ensure clear visibility and optimal functionality. Always power off the camera before cleaning to avoid any accidental damage or electrical issues. By maintaining a clean camera, you ensure high-quality video capture and reliable performance for your home security needs.
Firmware Updates
Keeping your light bulb security camera’s firmware up to date is crucial for optimal performance and security. Regular updates often include bug fixes, feature enhancements, and improved compatibility. To update the firmware, open the companion app (such as IPC360 HOME or Lorex Classic) and navigate to the camera settings. Check for available updates and follow the in-app instructions to download and install the latest version. Ensure the camera remains powered on and connected to Wi-Fi during the update process. Some models may require manual updates via a microSD card, but most support over-the-air updates for convenience. Always refer to the user manual for specific instructions, as the process may vary slightly between models. Updating firmware ensures your camera operates securely and efficiently, providing the best possible home security experience.
Battery Management
Proper battery management is essential for maintaining the functionality of your light bulb security camera. Many models come with rechargeable batteries, while others may require wired power. For battery-powered cameras, ensure they are fully charged before installation. Use the provided charging cable and avoid overcharging to prolong battery life. Some cameras feature low-battery notifications via the app, allowing you to recharge them before they lose power. To extend battery life, adjust settings like motion detection sensitivity or video quality. If your camera supports solar charging, consider using a compatible solar panel for continuous power. Regularly check the battery level in the app and recharge as needed. Neglecting battery care can lead to downtime, so prioritize charging to ensure your camera remains operational and your home stays secure. Always refer to the user manual for specific charging instructions tailored to your model.
Troubleshooting
Check if the camera is powered on and connected to a 2.4GHz Wi-Fi network. Reset the camera via the app or by pressing the reset button if it malfunctions.
Common Issues
Users often encounter connectivity issues, such as the camera not linking to the app or Wi-Fi network. Motion detection may falsely trigger alerts or fail to record events. The camera angle might not adjust properly, limiting visibility. Additionally, some users report difficulty with firmware updates or battery drainage in wireless models. Ensuring the camera is powered on and connected to a 2.4GHz network can resolve many of these problems. Resetting the device or reinstalling the app may also help. Regularly cleaning the lens and checking for software updates can prevent recurring issues. If problems persist, consulting the user manual or contacting customer support is recommended to ensure optimal performance and security monitoring.
Resetting the Camera
Resetting your light bulb security camera can resolve connectivity or software issues. To reset, locate the small reset button on the camera’s base. Use a pin or needle to press and hold it for 10-15 seconds until the indicator light flashes. This will restore the camera to its factory settings. After resetting, the camera will need to be reconnected to your Wi-Fi network and paired with the app again. Ensure the camera is powered on during the reset process. If issues persist, consult the user manual or contact customer support for further assistance. Resetting is a useful troubleshooting step for resolving connectivity or firmware-related problems.
Comparison
Light bulb security cameras like the Symynelec model offer higher resolution and Google compatibility, while others like the LaView L2 face issues with erratic recording, making them less reliable.
With Traditional Security Cameras
Light bulb security cameras offer a unique alternative to traditional security cameras, combining functionality with discreet design. Unlike bulky systems, they blend into lighting fixtures, providing a dual purpose of illumination and surveillance. While traditional cameras often require complex wiring and installation, bulb cameras simplify the process by screwing into existing sockets. They also offer features like night vision and remote access, which are typically found in high-end traditional systems. However, bulb cameras may lack the advanced motion tracking and higher resolution of dedicated security cameras. Their compact design makes them less obtrusive, ideal for homeowners seeking a subtle yet effective security solution. Overall, they strike a balance between convenience, affordability, and functionality, making them a viable option for modern home security needs.
Top Models Comparison
When comparing top models of light bulb security cameras, the Symynelec P6 stands out for its higher resolution and compatibility with Google systems, making it a top choice. The Wyze Bulb Cam offers a unique 2-in-1 solution, combining a smart bulb with a 2K HD camera, ideal for outdoor use. The LaView L2, while innovative, struggles with inconsistent recording. Each model excels in specific areas, such as night vision or app functionality. The Symynelec P6 is praised for its seamless integration, while the Wyze model is lauded for its affordability and dual-purpose design. The LaView L2, though clever, falls short in reliability. Ultimately, the best choice depends on individual needs, whether prioritizing resolution, cost, or ease of use. These models represent the cutting edge of home security, blending practicality with advanced features for enhanced protection.
Conclusion
Light bulb security cameras offer a practical and discreet solution for home and property surveillance. Their ease of installation, advanced features like motion detection and night vision, and seamless integration into existing lighting fixtures make them a versatile choice. With models like the Symynelec P6 and Wyze Bulb Cam leading the market, users can enjoy high-quality video, remote access, and reliable performance. These cameras strike a perfect balance between functionality and affordability, providing peace of mind without compromising on convenience. Whether for indoor or outdoor use, light bulb security cameras are an innovative and effective way to enhance home security, blending effortlessly into daily life while offering cutting-edge monitoring capabilities.